ちょっと複雑なレイアウトをConstraintLayoutで組んでみるpart1
Created at Tue, Apr 7, 2020今回の記事では次のレイアウトを、ConstraintLayoutで組みたいと思います。

ポイントは以下の3つです。
- 4つの画像を組み合わせて、1つの円形画像を作る部分
- 01/01の部分は右に、@your_idの部分はYour Nameの右に配置される
- Your Nameの部分の文字数が多いときに、…で省略される
今回は、4つの画像を組み合わせる部分で、Material ComponentのShapeableImageViewを使っています。ShapeableImageViewの説明はここを見てください。
上記で上げたポイントを中心に説明していきます。
4つの画像を組み合わせて、1つの円形画像を作る部分
この部分は、Picasso、Glideなどの画像ライブラリに頼るパターンもあると思うんですが、今回はShapeableImageViewを使いたいと思います。
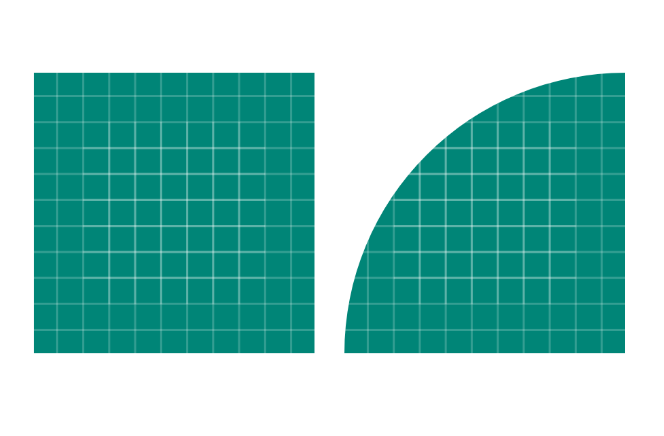
4つのShapeableImageViewを使い、それぞれ「左上、右上、左下、右下」の部分が丸くなるShapeを定義します。 左上を丸くするShapeは次のように定義できます。
<style name="ShapeAppearanceOverlay.Example.TopLeft" parent="">
  <item name="cornerFamilyTopLeft">rounded</item>
  <item name="cornerSizeTopLeft">100%</item>
</style>
右の画像が、上のShapeを指定した場合になります。
右上、左下、右下のShapeも同じように作ってあげます。そして、それら4つViewの制約を次のように作ってあげます。
<com.google.android.material.imageview.ShapeableImageView
  android:id="@+id/top_left"
  android:layout_width="30dp"
  android:layout_height="30dp"
  android:adjustViewBounds="true"
  android:scaleType="centerCrop"
  app:layout_constraintStart_toStartOf="parent"
  app:layout_constraintTop_toTopOf="parent"
  app:shapeAppearanceOverlay="@style/ShapeAppearanceOverlay.Example.TopLeft"
  tools:src="@tools:sample/avatars" />

<com.google.android.material.imageview.ShapeableImageView
  android:id="@+id/top_right"
  android:layout_width="30dp"
  android:layout_height="30dp"
  android:adjustViewBounds="true"
  android:scaleType="centerCrop"
  app:layout_constraintStart_toEndOf="@id/top_left"
  app:layout_constraintTop_toTopOf="@id/top_left"
  app:shapeAppearanceOverlay="@style/ShapeAppearanceOverlay.Example.TopRight"
  tools:src="@tools:sample/avatars" />

<com.google.android.material.imageview.ShapeableImageView
  android:id="@+id/bottom_left"
  android:layout_width="30dp"
  android:layout_height="30dp"
  android:adjustViewBounds="true"
  android:scaleType="centerCrop"
  app:layout_constraintStart_toStartOf="@id/top_left"
  app:layout_constraintTop_toBottomOf="@id/top_left"
  app:shapeAppearanceOverlay="@style/ShapeAppearanceOverlay.Example.BottomLeft"
  tools:src="@tools:sample/avatars" />

<com.google.android.material.imageview.ShapeableImageView
  android:id="@+id/bottom_right"
  android:layout_width="30dp"
  android:layout_height="30dp"
  android:adjustViewBounds="true"
  android:scaleType="centerCrop"
  app:layout_constraintStart_toEndOf="@id/bottom_left"
  app:layout_constraintTop_toTopOf="@id/bottom_left"
  app:shapeAppearanceOverlay="@style/ShapeAppearanceOverlay.Example.BottomRight"
  tools:src="@tools:sample/avatars" />
やっていることは単純で、4つのViewをapp:layout_constraintStart_toStartOfなどを使って適切な位置に配置しています。
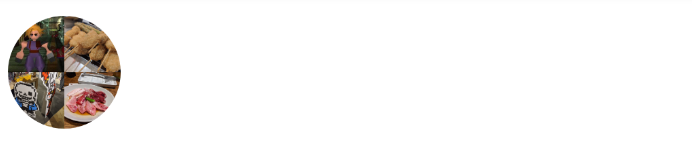
これで4つの画像を組み合わせて、円形の画像を表現するところまで出来ました。
01/01の部分は右に、@your_idの部分はYour Nameの右に配置される
01/01の部分は右に固定なので、app:layout_constraintEnd_toEndOf="parent"を指定すれば良さそうです
<TextView
  android:id="@+id/date"
  android:layout_width="wrap_content"
  android:layout_height="wrap_content"
  android:layout_marginEnd="16dp"
  app:layout_constraintEnd_toEndOf="parent" />
次にYour Nameは一番左に、@your_idはそれの右に配置します。
<TextView
  android:id="@+id/name"
  android:layout_width="wrap_content"
  android:layout_height="wrap_content"
  android:ellipsize="end"
  android:lines="1"
  app:layout_constraintEnd_toStartOf="@id/user_id"
  app:layout_constraintStart_toEndOf="@id/top_right"
  app:layout_constraintTop_toTopOf="parent"
  tools:text="TESTTESTTES" />

<TextView
  android:id="@+id/user_id"
  android:layout_width="wrap_content"
  android:layout_height="wrap_content"
  android:layout_marginStart="6dp"
  android:layout_marginEnd="8dp"
  android:lines="1"
  app:layout_constraintBaseline_toBaselineOf="@id/name"
  app:layout_constraintEnd_toStartOf="@id/date"
  app:layout_constraintStart_toEndOf="@id/name"
  tools:text="your id" />
すると次のようになります。
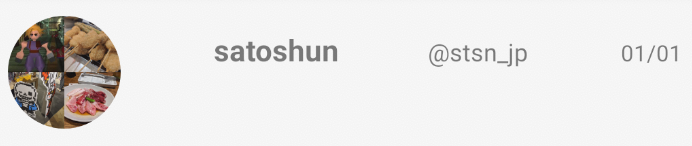
Your Nameと、@your_idが真ん中に寄ってしまったので、app:layout_constraintHorizontal_chainStyleを指定して、左寄せにします。
<TextView
  android:id="@+id/name"
  android:layout_width="wrap_content"
  android:layout_height="wrap_content"
  android:ellipsize="end"
  android:lines="1"
  app:layout_constraintEnd_toStartOf="@id/user_id"
  app:layout_constraintHorizontal_bias="0"
  app:layout_constraintHorizontal_chainStyle="packed"
  app:layout_constraintStart_toEndOf="@id/top_right"
  app:layout_constraintTop_toTopOf="parent"
  tools:text="TESTTESTTES" />
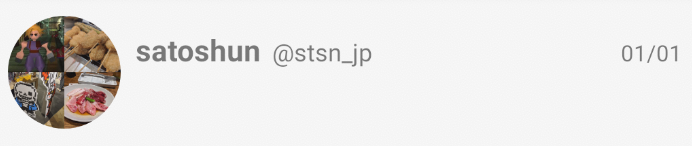
これで、3つのTextViewを正しい位置に配置することが出来ました。
Your Nameの部分の文字数が多いときに、…で省略される
次に、Your Nameの文字数が多い場合を考えていきます。
現状のレイアウトだと、文字数が多い場合には次のように表示されます。
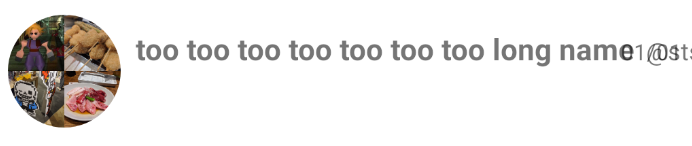
wrap_contentの場合、制約を超えて枠をはみ出してしまうためです。
これを解決するために、app:layout_constrainedWidthを使います。これを使うと、制約を超えないwrap_contentを定義できます。
<TextView
  android:id="@+id/name"
  android:layout_width="wrap_content"
  android:layout_height="wrap_content"
  android:ellipsize="end"
  android:lines="1"
  app:layout_constrainedWidth="true"
  app:layout_constraintEnd_toStartOf="@id/user_id"
  app:layout_constraintHorizontal_bias="0"
  app:layout_constraintHorizontal_chainStyle="packed"
  app:layout_constraintStart_toEndOf="@id/top_right"
  app:layout_constraintTop_toTopOf="parent"
  tools:text="TESTTESTTES" />
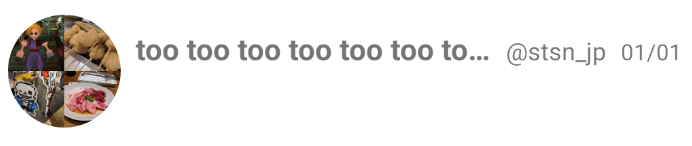
Your Nameの部分を…にすることが出来ました。
あとの部分はそう難しくないと思うので、説明を省略させてください。全コードはここにあります。
まとめ
- ShapeableImageViewは便利
layout_constraintHorizontal_chainStyle、layout_constraintHorizontal_biasを組み合わせることで左寄せに出来る- 制約を超えないように、wrap_contentのレイアウトを使いたい場合は、
layout_constrainedWidthを使う - ソースコードはここにあります。